How to Make Images Larger Without Losing Quality?


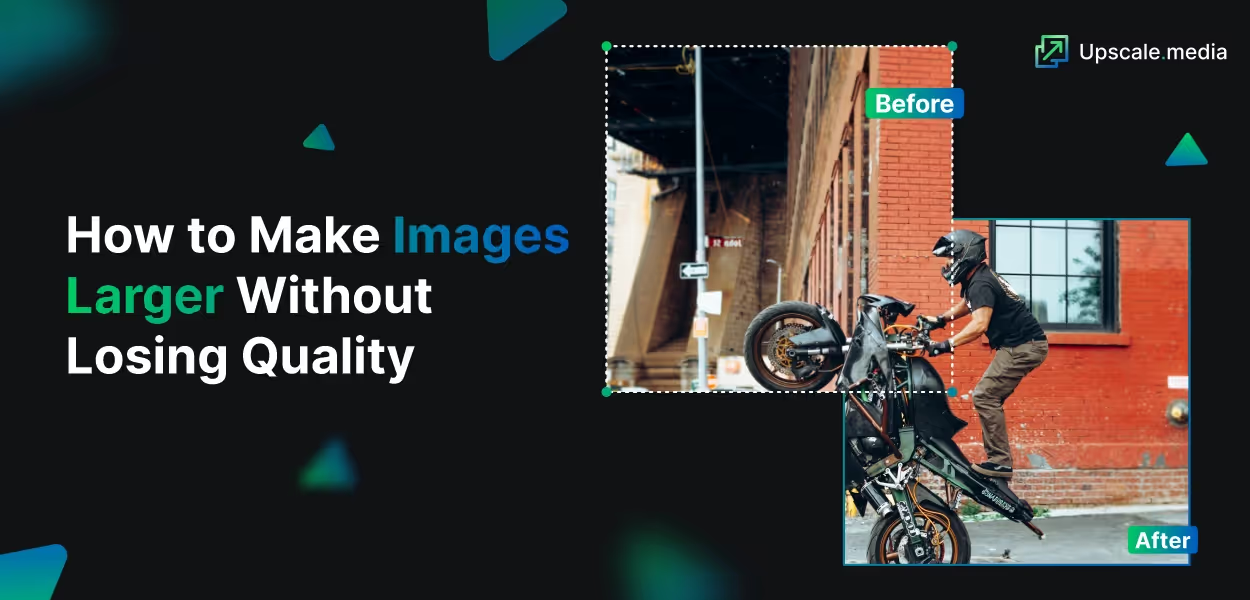
In the digital age, images play a crucial role in our daily lives, from personal memories to professional presentations. However, the challenge of making images larger without losing quality is a common hurdle many face. Whether you're an artist seeking to showcase your work in high resolution or a business needing sharp, clear visuals for marketing, finding a reliable solution is essential.
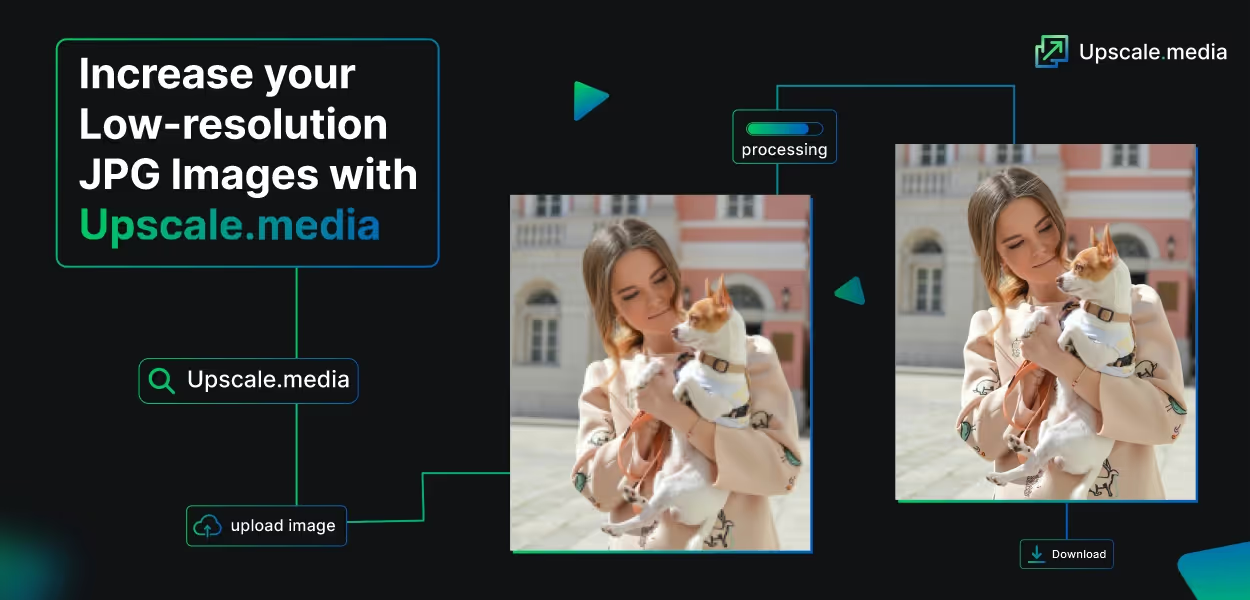
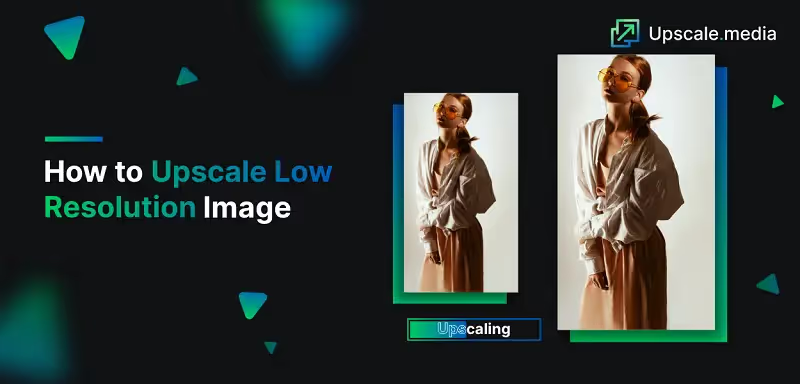
Imagine transforming your low-resolution photos into stunning, high-definition images effortlessly. With Upscale.media, you can easily enlarge images without losing quality, thanks to our advanced AI technology. Our platform is designed to help you enlarge pictures without losing quality, ensuring your visuals remain sharp and vibrant, no matter the size.
At Upscale.media, we understand the importance of maintaining image clarity. Our tools are user-friendly and efficient, making the process of upscaling images seamless and hassle-free. Experience the difference with Upscale.media and unlock the potential of your visuals today. Discover how our state-of-the-art AI can help you achieve stunning results with just a few clicks.
Understanding Image Quality and Resolution
When it comes to digital images, two critical factors determine their overall appearance: image quality and resolution. Understanding these concepts is essential for successfully enlarging images without compromising their clarity and detail.
1. Image Quality
Image quality refers to how visually clear and detailed an image appears. High-quality images are sharp, vibrant, and free from distortions or artifacts. Several factors influence image quality, including the camera's sensor, lighting conditions, and post-processing techniques. When you enlarge an image, maintaining its original quality is crucial to avoid pixelation and blurriness.
2. Resolution
Resolution defines the amount of detail an image holds, typically measured in pixels. It is often represented as width x height (e.g., 1920 x 1080 pixels). Higher resolution means more pixels, which translates to greater detail and clarity. For instance, a 4K image (3840 x 2160 pixels) has a higher resolution and better detail compared to a 1080p image (1920 x 1080 pixels).
When enlarging an image, the goal is to increase its resolution while preserving quality. Traditional methods of scaling up images often result in a loss of detail and clarity because the added pixels do not contain new information. However, advanced AI-powered tools like Upscale.media can intelligently upscale images by analyzing patterns and textures, ensuring that the enlarged image remains sharp and clear.
By leveraging AI technology, Upscale.media can effectively enlarge images without losing quality, providing high-resolution results that meet the demands of various applications, from professional photography to marketing and print media. Understanding the principles of image quality and resolution empowers you to make informed decisions and achieve the best possible outcomes when enhancing your images.
Why do Resized Images Lose Quality?
Resizing images is a common task, whether you're adjusting a photo for social media, creating marketing materials, or printing a high-resolution poster. However, many people need help with a frustrating issue: the loss of quality when enlarging images. Understanding why this happens can help you find better solutions and avoid common pitfalls.
- Pixelation and Blurring: When you resize an image, you're essentially changing the number of pixels that make up the image. If you enlarge an image without adding new pixel data, the software has to stretch the existing pixels, leading to pixelation and blurring. This is because the original image data is being spread over a larger area, causing a noticeable loss in sharpness.
- Loss of Detail: Enlarging an image can result in the loss of fine details. The resizing process can blur or distort small elements in the image, which can be especially problematic for high-detail images like photographs or graphics. This loss of detail is due to the software's limitations in extrapolating and preserving the original information.
- Interpolation Methods: Different software tools use various interpolation methods to resize images. Basic methods, such as nearest-neighbour or bilinear interpolation, might produce acceptable results for minor adjustments but need help with larger enlargements. These methods calculate new pixel values based on surrounding pixels, often leading to a loss of clarity and precision.
- Image Compression: Often, resized images are compressed to reduce file size. This compression can further degrade image quality by introducing artefacts and reducing overall sharpness. Compression algorithms are designed to remove some image data to save space, but this can be detrimental when combined with resizing.
To achieve high-quality enlargements without these issues, advanced tools like Upscale.media use sophisticated AI algorithms to enhance and upscale images. These tools analyse the existing image data and intelligently add new pixels to maintain clarity and detail, minimising the quality loss commonly associated with resizing.
Why It’s Important to Resize Images? (Without Losing Quality)
In today's visually driven world, high-quality images are essential for making a strong impression, whether in marketing materials, online portfolios, or personal projects. Resizing images while maintaining their quality is crucial for several reasons:
- Professional Presentation: High-resolution images convey a sense of professionalism and attention to detail. Whether you're a business showcasing products or a photographer displaying your portfolio, crisp, clear images can significantly impact how your work is perceived. Resizing without quality loss ensures that your visuals look sharp and polished, enhancing your professional image.
- Effective Marketing and Branding: For businesses, consistent and high-quality visuals are key to effective branding and marketing. Enlarging images without degrading their quality ensures that promotional materials, websites, and social media posts are visually appealing and engaging. High-resolution images attract more attention and convey your brand's message more effectively.
- Improved User Experience: On digital platforms, users expect a seamless experience, including high-quality images that load quickly and look good on all devices. Enlarging images without losing quality ensures that your website or app delivers a better user experience, keeping visitors engaged and reducing bounce rates.
- Versatility Across Platforms: Images often need to be resized for different uses, such as social media, print, and web. Maintaining quality while resizing ensures that your visuals remain effective and consistent across various platforms and formats. Whether you're creating a banner for a website or a high-quality print ad, preserving image quality is essential.
- Avoiding Image Artifacts: Enlarging images can sometimes introduce artefacts like blurriness or pixelation. By using advanced resizing techniques that preserve quality, you avoid these artefacts, ensuring that your images remain clear and professional. This is especially important for high-detail images or graphics where precision is crucial.
By prioritising quality during the resizing process, you ensure that your images continue to perform well across different applications, preserving their visual impact and supporting your overall goals. Tools like Upscale. Media offers advanced solutions for resizing images while maintaining their quality, helping you achieve the best results every time.
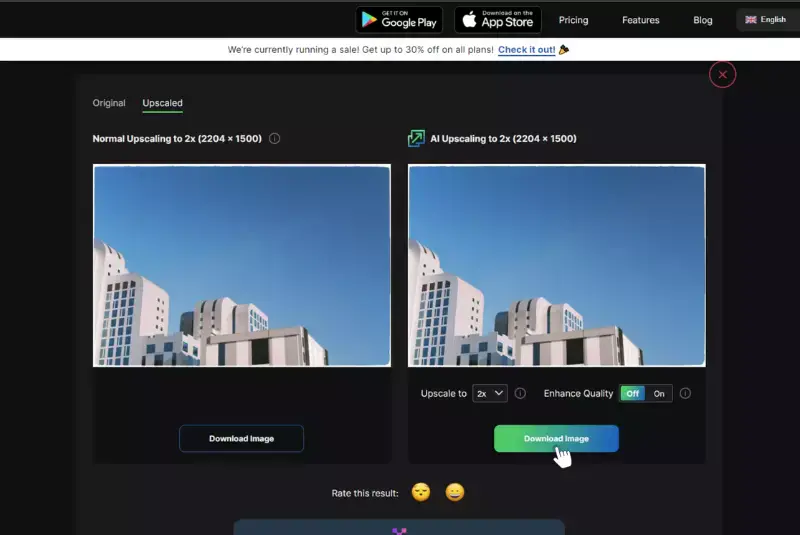
How to Enlarge the Image Without Losing Quality?
Looking to increase image size without losing quality? Upscale.media is your go-to solution for enhancing and upscaling photos effortlessly. Our cutting-edge AI technology ensures that your images maintain their clarity and sharpness, even when enlarged.
Whether you're working with PNG, JPEG, JPG, WEBP, or HEIC formats, Upscale.media seamlessly handles various file types to provide you with stunning results. With our user-friendly tool, you can upscale your images while preserving their original quality, making your visuals look professional and impactful. Discover the power of Upscale.media and transform your images with ease and precision.
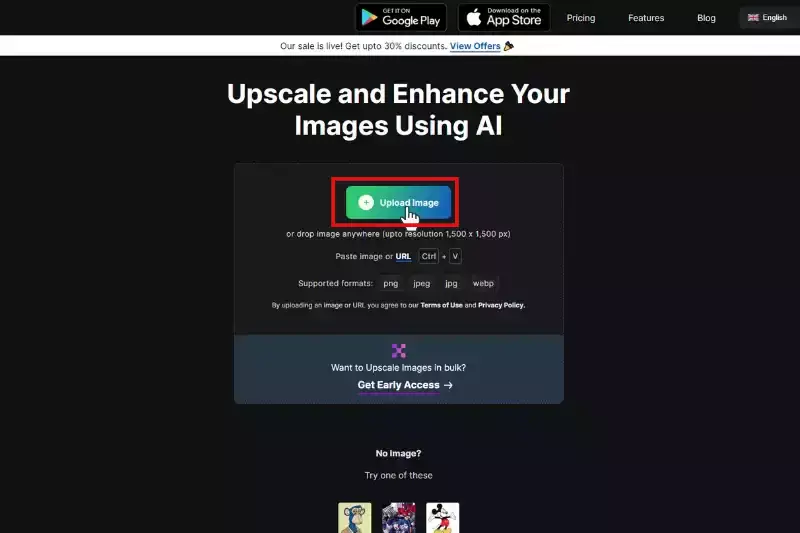
Step 1 - Visit the Upscale.media website.
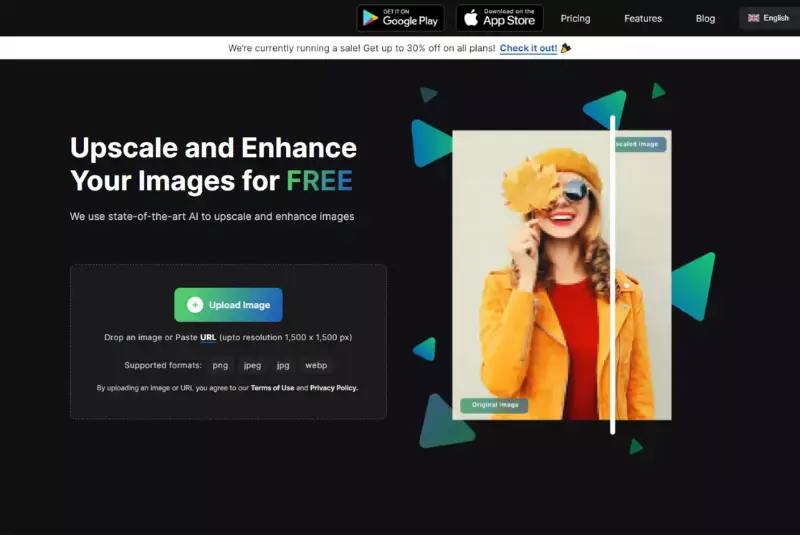
Step 2 - Upload your image by clicking on the "Upload Image" button.
Step 3 - After uploading the image, click on the "Resize" option below the Size section in the left menu.

Step 4 - Fill in the desired values for the new size of your image. You can enter the dimensions in pixels or choose a percentage increase.
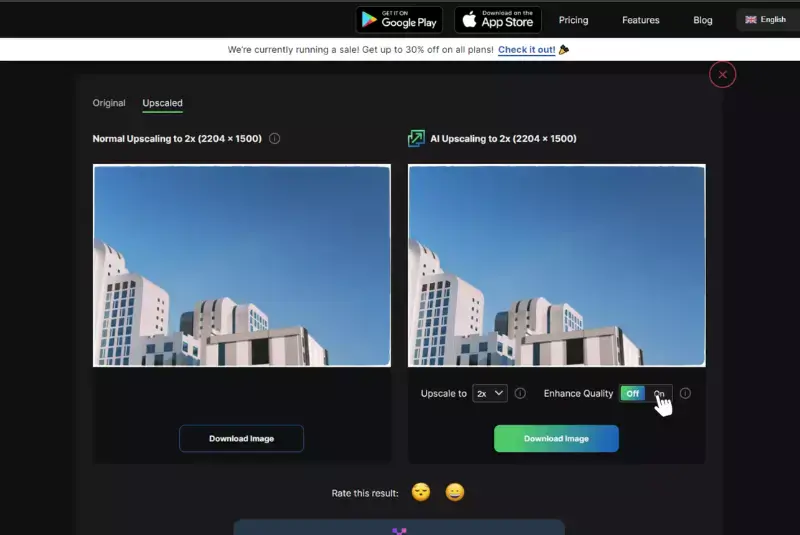
Step 5 - Click the "Apply" button to start resizing.
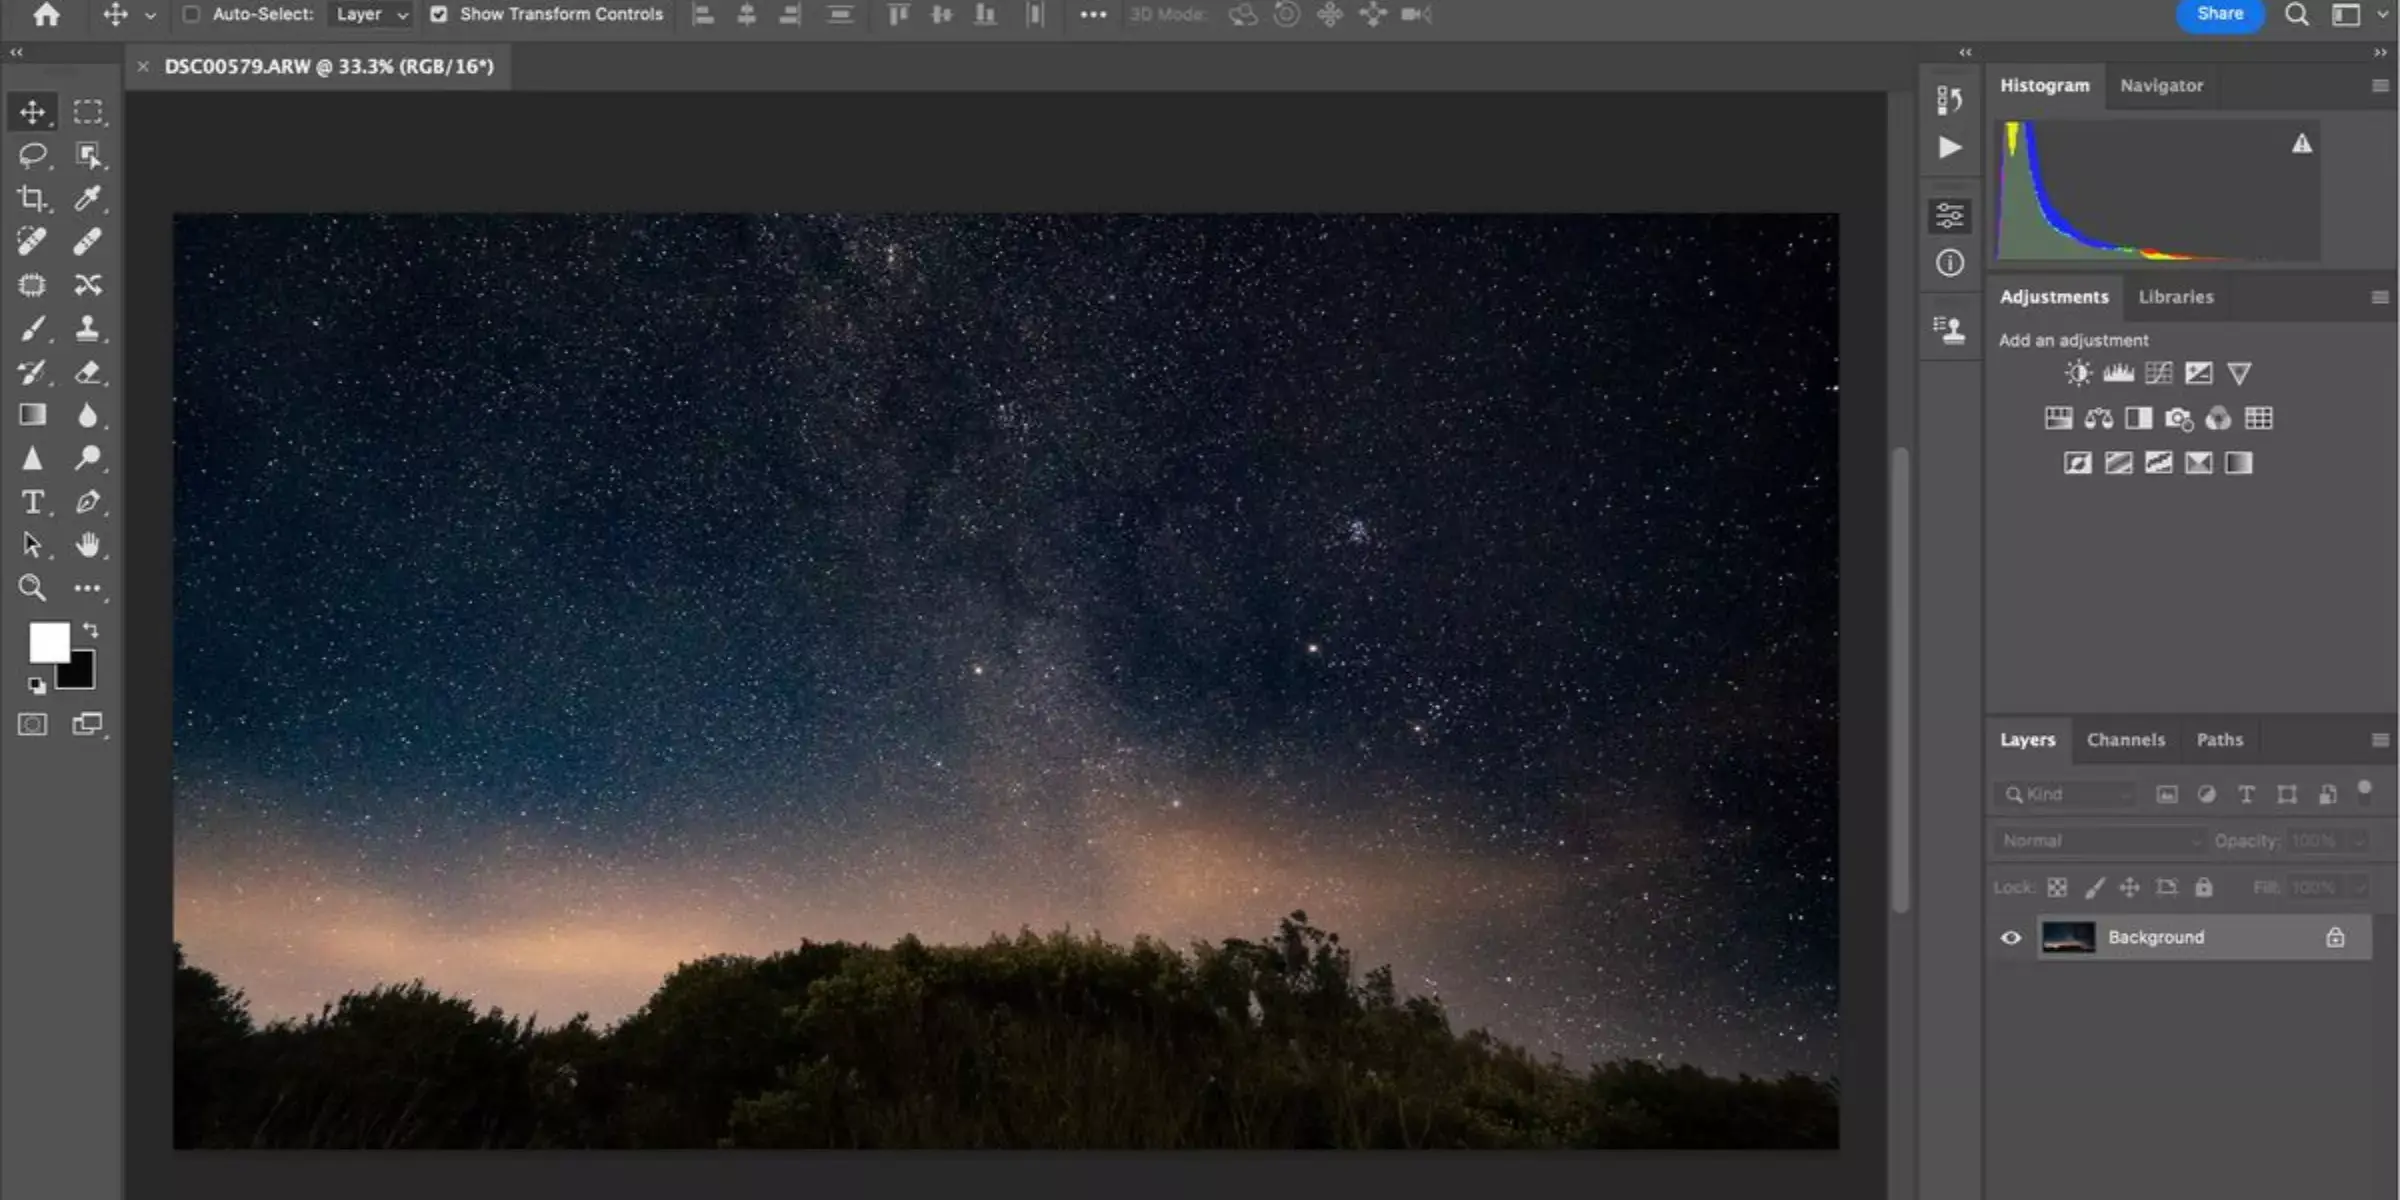
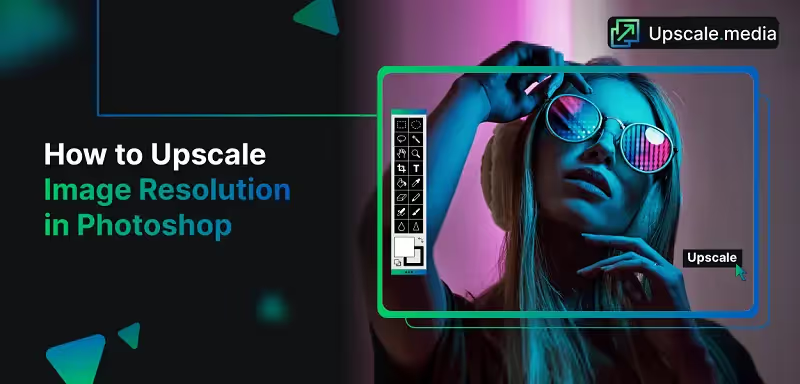
How to Enlarge Image in Photoshop?
Enlarging images in Photoshop is a powerful way to enhance visuals while maintaining their quality. Whether you're working on a graphic design project, preparing images for print, or simply improving the resolution of a photo, Photoshop offers robust tools to achieve sharp and clear results. By using features like "Image Size" and selecting advanced resampling methods, you can scale up your images with precision.
Photoshop's intelligent algorithms help to retain detail and minimise distortions, making it an ideal choice for professional-quality enlargements. Dive into Photoshop's resizing capabilities and learn how to enhance your images effectively, ensuring they look their best at any size.
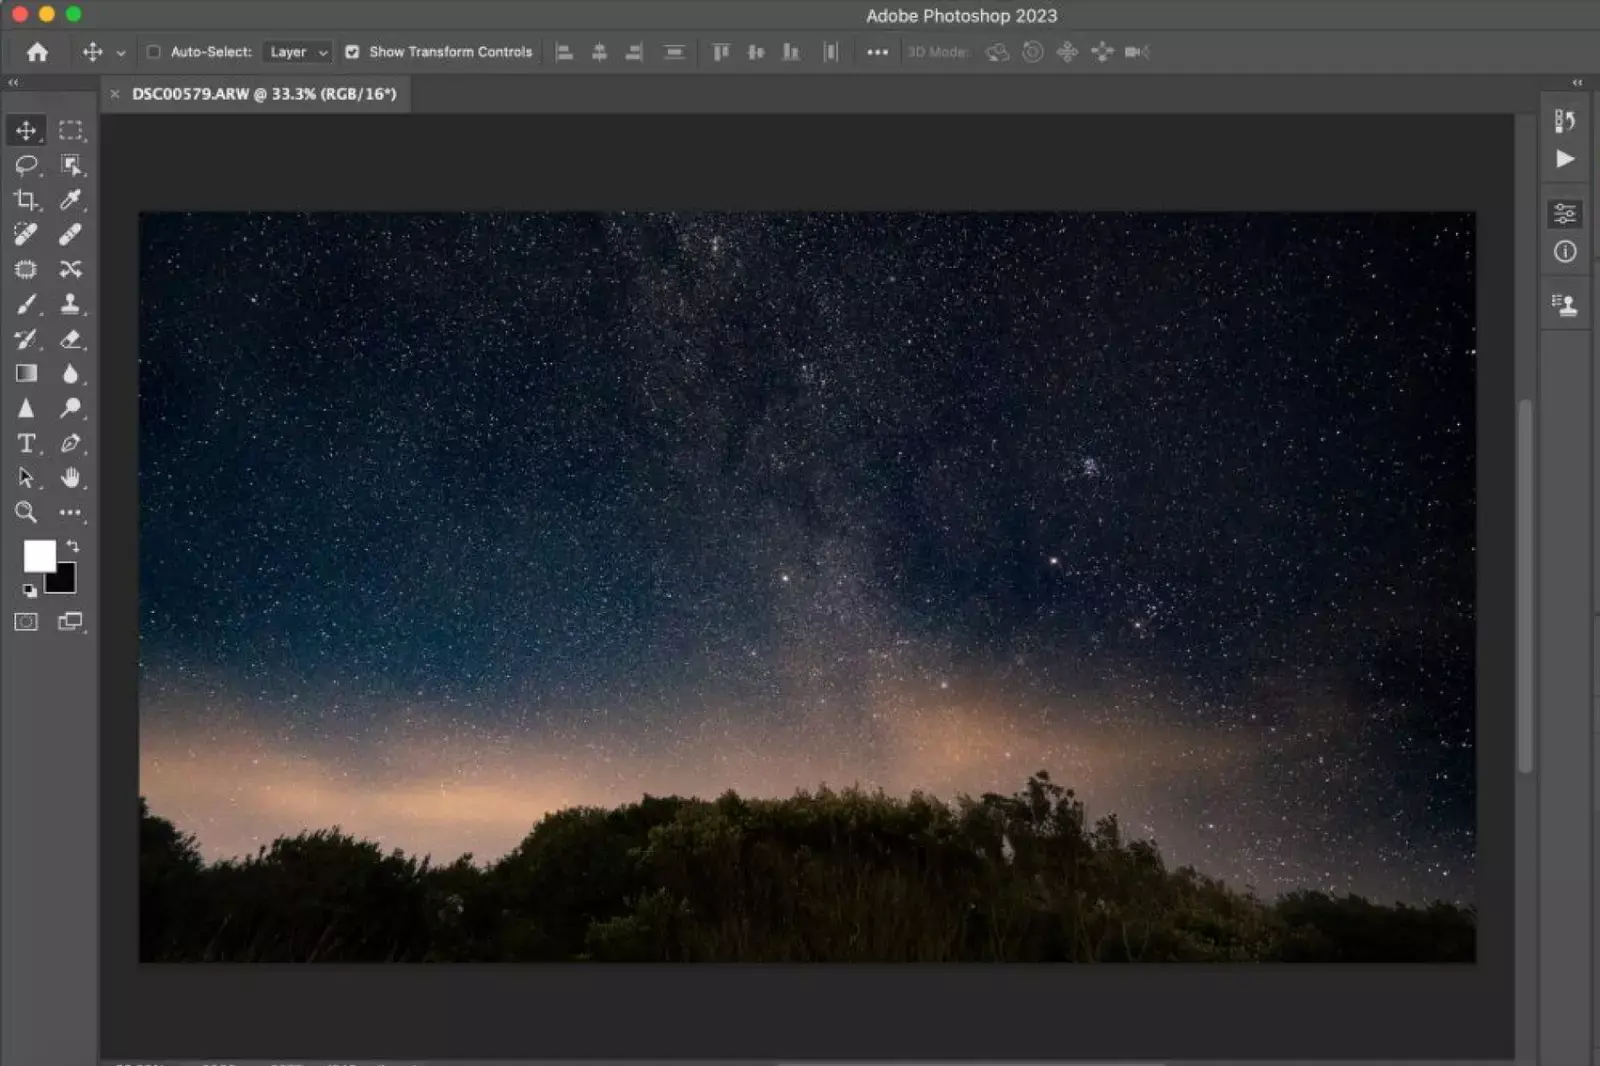
If you need to increase the size of an image in Photoshop to meet your printable requirements, follow these simple steps:
Note: Before enlarging the photo, it's advisable to minimise any imperfections or blemishes, as a higher resolution may make them more noticeable.
Step 1 - Open the image you want to enlarge in Photoshop.
Step 2 - From the top menu, click "Image" and select "Image Size" from the dropdown list.
Step 3 - In the "Pixel Dimensions" section, enter your desired values for width and height. You can also adjust the resolution if needed.
Step 4 - check the "Resample" option and select "Bicubic Smoother" as the resampling method. This method is ideal for enlargements as it provides smoother results.
Step 5 - Click "OK" to apply the changes.
Step 6 - Save the enlarged image by going to "File" and selecting "Save As" or "Export" depending on your preference.
Step 7 - Choose the desired file format and location to save the image, and click "Save."
That's it! You have successfully enlarged the image using Photoshop. You can now use the downloaded image for your printing or other purposes.
How to Enlarge Your Image for Printing
Enlarging images for printing requires careful attention to detail to ensure high-quality results. When preparing images for print, it's crucial to maintain clarity and sharpness, even as you increase their size. Using advanced software like Photoshop or specialised tools, you can adjust the image dimensions while preserving resolution and detail.
Consider factors such as DPI (dots per inch) and file format to ensure your enlarged image meets print standards. By following these steps, you can produce stunning prints that look professional and vibrant, capturing every detail beautifully. Learn how to effectively enlarge your images for printing and achieve exceptional quality for all your print projects.

When printing photos, it's important to understand the concept of dpi (dots per inch) and its significance. Here's a step-by-step guide on how to enlarge your image for printing using the Fotor online tool:
Step 1 - Begin by uploading your image to the Fotor platform.
Step 2 - Locate the "Resize" option in the menu on the left side of the screen.
Step 3 - Click "Resize" and enter the desired printing values in the provided blank spaces. For optimal printing quality, a commonly recommended dpi is 300.
Step 4 - Once you've entered the appropriate values, download the enlarged image in JPG or PNG format.
By following these steps, you can effectively resize and enhance your image for printing purposes. Remember to choose the dpi value that best suits your specific printing requirements, whether for business documents, posters, or personal photography. With Fotor, you can achieve high-quality prints that meet your expectations.
Upsampling vs. Downsampling Images
Upsampling and downsampling are key techniques for adjusting image size. Upsampling enlarges images, often risking quality loss, while downsampling reduces image size, preserving clarity. Understanding these methods helps you manage image resolution effectively, ensuring optimal quality for both enlargements and reductions.
1. Upsampling
- Definition: Upsampling refers to increasing the resolution or size of an image. This process adds more pixels to the image, expanding its dimensions.
- Purpose: Upsampling is used when you need to enlarge an image for printing, displaying on larger screens, or enhancing details for better visibility.
- How It Works: During upsampling, algorithms estimate and create additional pixels to fill in the gaps. Techniques like interpolation (e.g., Bicubic, Lanczos) help maintain image quality by smoothing or sharpening details.
- Challenges: Enlarging an image can lead to a loss of clarity, as new pixels are interpolated rather than originally captured, which might introduce blurriness or artefacts.
2. Downsampling
- Definition: Downsampling involves reducing the resolution or size of an image. This process removes pixels to decrease the image’s dimensions.
- Purpose: Downsampling is commonly used to reduce file sizes for faster loading, optimise images for web use, or fit images into specific dimensions without overwhelming storage.
- How It Works: During downsampling, algorithms average or select pixels from the original image to create a smaller version. Techniques like averaging or subsampling ensure that the image retains as much detail as possible while reducing size.
- Challenges: Reducing an image’s size can lead to a loss of detail and clarity, as information is discarded to fit the new dimensions.
Choosing Between Upsampling and Downsampling
Upsampling is ideal when enlarging images, and you want to preserve or enhance detail, but it requires high-quality algorithms to mitigate quality loss. Downsampling is best when you need to reduce image size while retaining as much detail as possible, optimising images for specific uses or storage constraints. Understanding these processes helps in making informed decisions about image size and quality for various applications.
Top 10 Tools for Enlarging Images Without Losing Quality
When you need to increase image size without losing quality, having the right tools is essential. Modern image upscaling solutions use advanced algorithms and AI technology to ensure that you can zoom a photo without losing clarity. These tools are designed to help you enlarge an image without losing quality, making them perfect for both personal and professional use.
By leveraging these powerful solutions, you can achieve high-resolution results that maintain the sharpness and detail of your visuals. Discover how these tools can transform your images, ensuring they look stunning at any size.
1. Upscale.media
Upscale.media is a cutting-edge tool designed to help you enlarge images without losing quality. Leveraging advanced AI technology, it transforms your photos and graphics to higher resolutions while preserving their original clarity and detail.
Whether you're preparing images for professional use, enhancing personal photos, or working on creative projects, Upscale.media ensures that your visuals maintain their sharpness and vibrancy. With its user-friendly interface and powerful features, Upscale.media is the ideal choice for achieving stunning, high-resolution results effortlessly.
Key Features
- AI-driven image enhancement for superior quality
- Supports various formats, including PNG, JPEG, JPG, WEBP, and HEIC
- Bulk processing capabilities for efficient large-scale enhancements
- Seamless API integration for smooth workflow integration
- Easy-to-use platform with an intuitive interface
Test Results
- AI-enhanced images consistently showed improved clarity and detail
- Successfully upscaled images to 1080p with minimal loss in quality
- Maintained original colour accuracy and contrast in enhanced images
- Fast processing times with bulk transformation capability
2. Adobe Photoshop
Adobe Photoshop is a premier tool for enlarging pictures without losing quality. Known for its powerful editing capabilities, Photoshop utilises advanced algorithms to resize images while maintaining sharpness and detail. Whether you're preparing images for high-resolution prints or enhancing digital visuals, Photoshop’s sophisticated resampling methods ensure that your enlarged pictures retain their original clarity.
With its extensive range of features and flexibility, Adobe Photoshop is the go-to solution for professionals seeking to achieve flawless image enlargements and high-quality results.
Key Features
- Advanced resampling methods like Preserve Details and Bicubic Smoother
- Comprehensive image editing and enhancement tools
- Supports various image formats, including PSD, TIFF, and JPEG
- Layer-based editing for precise adjustments
- Integration with Adobe Creative Cloud for seamless workflow
Test Results
- Users consistently rate Adobe Photoshop highly for its image resizing capabilities, noting its effectiveness in enlarging pictures without compromising quality.
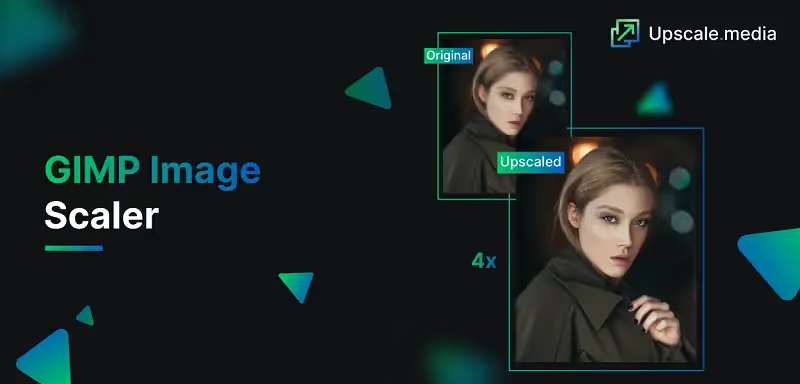
3. GIMP
GIMP (GNU Image Manipulation Program) is a powerful and versatile open-source tool for enlarging images. It offers robust features to resize images while striving to maintain high quality. Ideal for both amateur and professional users, GIMP utilises advanced interpolation techniques to minimise blurriness and pixelation when scaling up your visuals.
Whether you’re working on a graphic design project or simply enhancing personal photos, GIMP provides a cost-effective solution for achieving clear, high-resolution enlargements.
Key Features
- Multiple interpolation methods, including Cubic and Sinc (Lanczos), for high-quality resizing
- Comprehensive image editing and manipulation tools
- Support for various file formats, including PNG, JPEG, and TIFF
- Customisable interface and extensible through plugins
- Free and open-source, with regular updates and community support
Test Results
- Users appreciate GIMP for its robust image resizing capabilities and flexibility. It is praised for being a powerful, free alternative to paid software, though some users note that its interface could be more intuitive compared to commercial tools.
4. Let’s Enhance
Let’s Enhance is a sophisticated tool designed to increase image size without losing quality. Leveraging cutting-edge AI technology, it provides an intuitive and efficient way to upscale images while preserving their original detail and clarity.
Ideal for photographers, designers, and businesses, Let’s Enhance ensures your visuals look sharp and professional, even at larger dimensions. With its user-friendly interface and advanced algorithms, you can enhance your images effortlessly, achieving high-quality results that stand out.
Key Features
- AI-driven algorithms for superior image enhancement
- Support for multiple formats, including PNG, JPEG, and TIFF
- Options for batch processing to handle multiple images at once
- Automatic noise reduction and artefact removal for cleaner results
- User-friendly interface with quick and easy image uploads
Test Results
- Let’s Enhance is highly rated for its ability to increase image size without losing quality, with users praising its ease of use and effective AI enhancements. The tool is recognised for delivering crisp, high-resolution results that enhance visual impact.
5. Enhance.Pho.to

Enhance.Pho.to is a powerful online tool designed to zoom photos without losing quality. Utilising advanced algorithms, this tool enhances your images with remarkable clarity and detail, even when magnified.
Whether you’re a casual user looking to improve personal photos or a professional needing precise image adjustments, Enhance.Pho.to ensure your visuals remain sharp and vibrant. Its straightforward interface and efficient processing make it an excellent choice for anyone needing quick, high-quality image enlargements.
Key Features
- AI-powered enhancements for maintaining image clarity
- Easy-to-use interface with drag-and-drop functionality
- Supports various formats, including PNG, JPEG, and BMP
- Automatic correction of colour and exposure issues
- Fast processing for quick results
Test Results
- Enhance.Pho.to is well-regarded for its ability to zoom photos without losing quality. Users appreciate its simplicity and effective results, though some note that advanced features are limited in the free version. Overall, it is praised for providing clear and detailed image enlargements quickly.
6. Fotor
Fotor is an intuitive and versatile tool for enlarging an image without losing quality. With its user-friendly interface and powerful features, Fotor makes it easy to upscale photos while preserving their clarity and detail.
Ideal for both personal and professional use, Fotor’s advanced algorithms ensure that your enlarged images maintain high resolution and sharpness. Whether you're working on a creative project or enhancing family photos, Fotor offers a reliable solution for achieving high-quality enlargements effortlessly.
Key Features
- Intelligent resizing algorithms to maintain image clarity
- Simple drag-and-drop interface for easy uploads
- Supports multiple formats, including PNG, JPEG, and TIFF
- Built-in photo editing tools for additional enhancements
- Batch processing capabilities for handling multiple images at once
Test Results
- Fotor is praised for its ability to enlarge images without losing quality, offering clear and sharp results. Users appreciate its straightforward interface and effective resizing capabilities, making it a popular choice for both personal and professional image enhancement needs.
7. Waifu2x
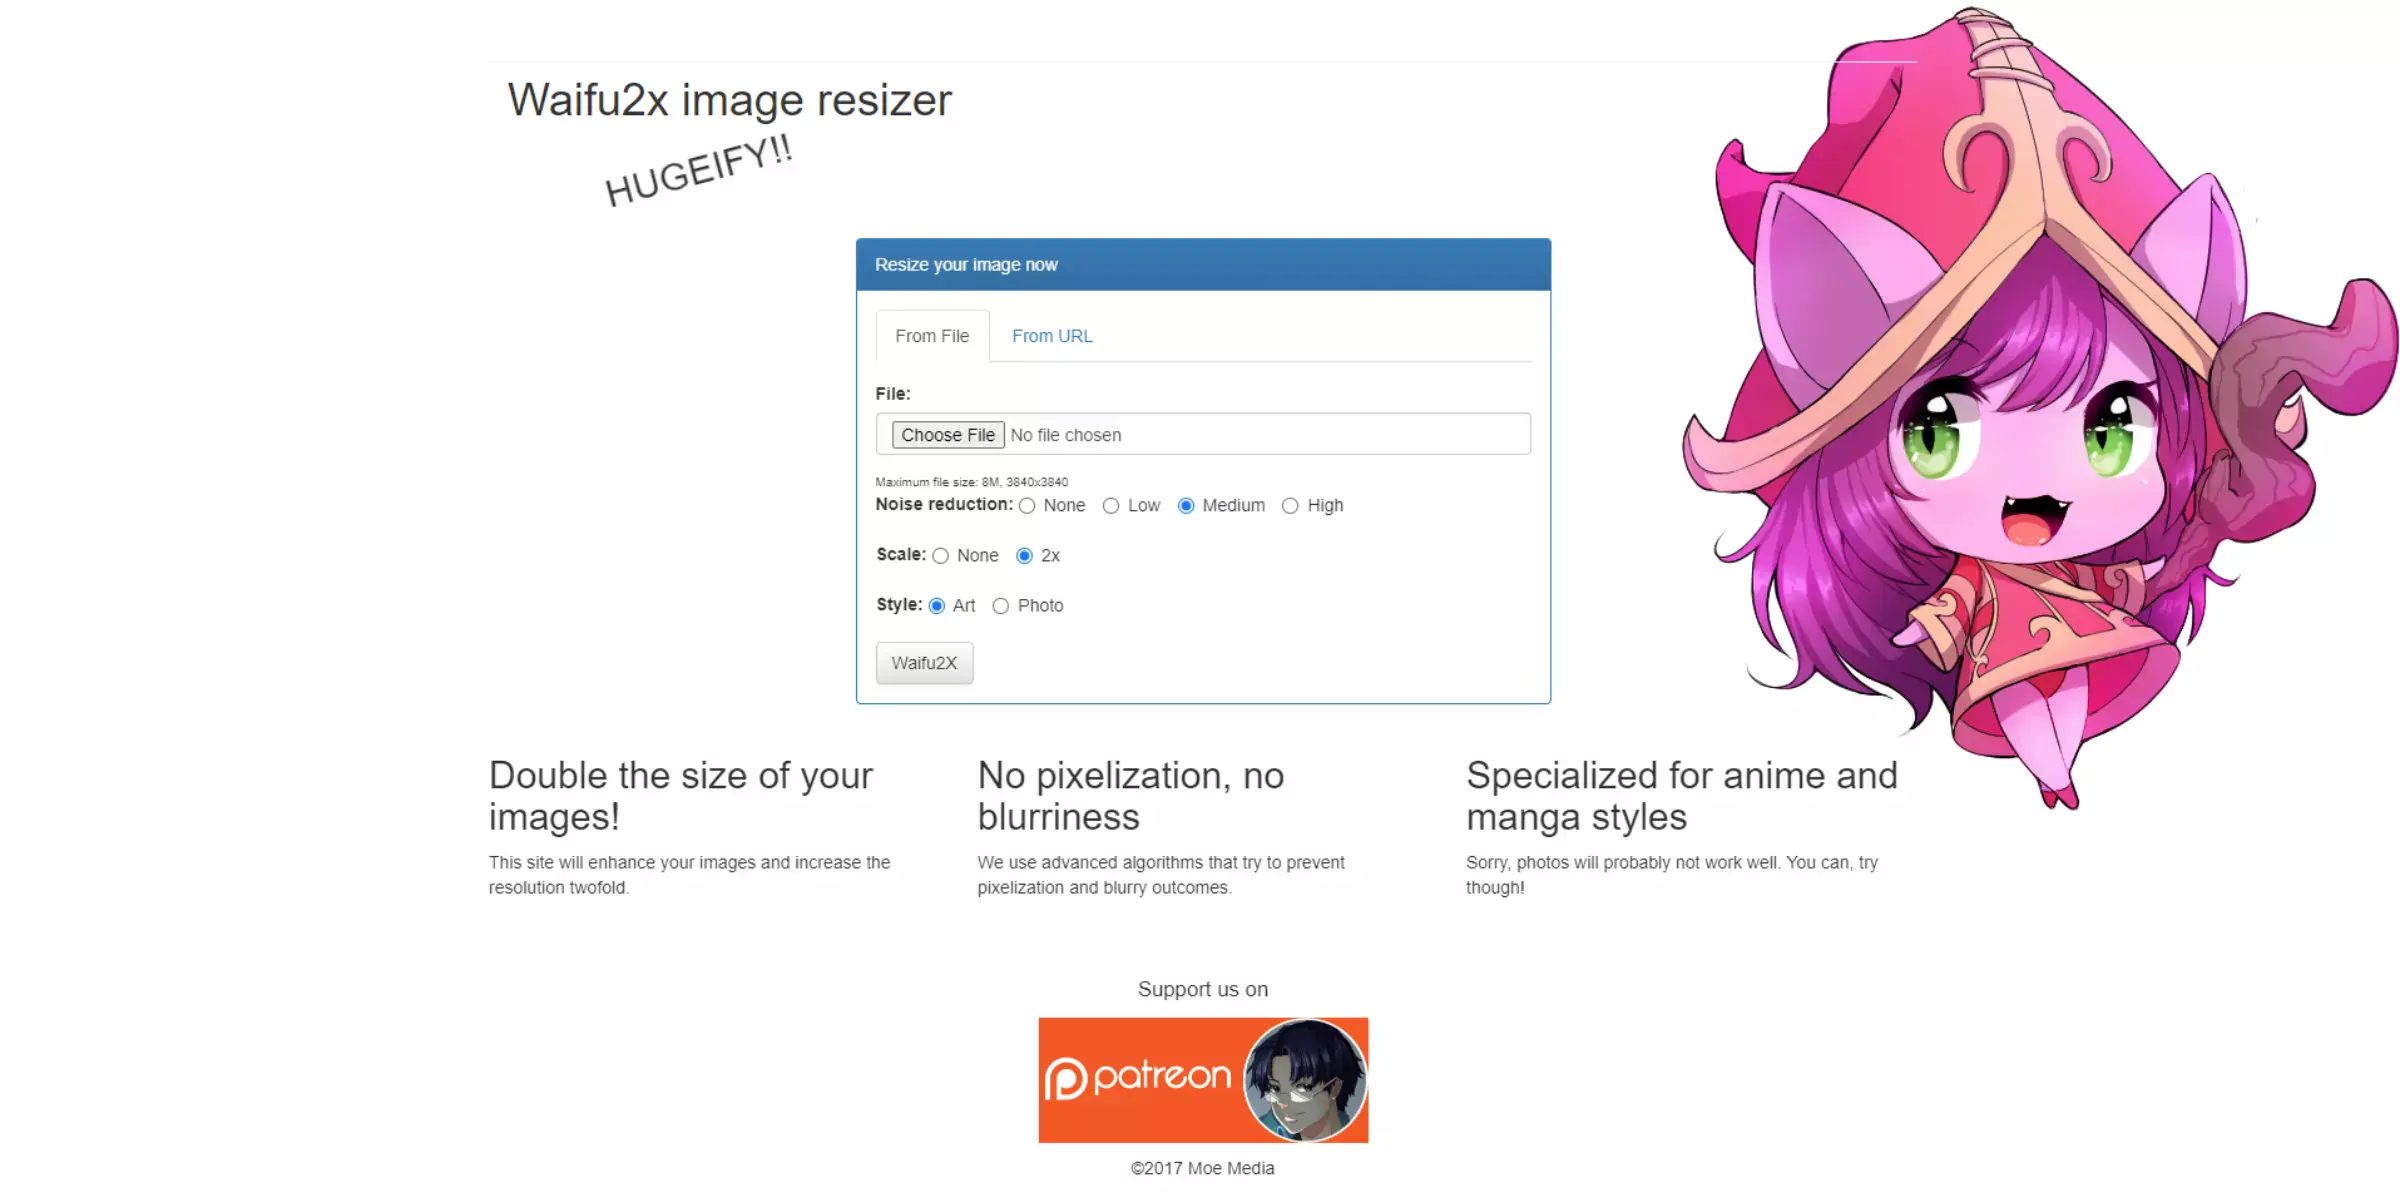
Waifu2x is a specialised tool designed for photo zoom without losing quality. Originally developed for enhancing anime-style images, its powerful AI algorithms have proven effective for a wide range of image types.
Waifu2x offers high-resolution upscaling while maintaining sharpness and detail, making it ideal for both artistic and practical applications. Whether you’re enhancing artwork or improving the clarity of personal photos, Waifu2x delivers impressive results with minimal effort.
Key Features
- AI-driven technology for high-quality image upscaling
- Effective noise reduction and artefact removal
- Simple interface for easy use and quick results
- Supports various formats, including PNG and JPEG
- Free to use with optional donations for continued development
Test Results
- Waifu2x is highly regarded for its ability to zoom photos without losing quality. Users commend its effective noise reduction and sharp enlargement capabilities, making it a favoured choice for those needing high-resolution results, particularly in the realm of anime and digital art.
8. AI Image Enlarger
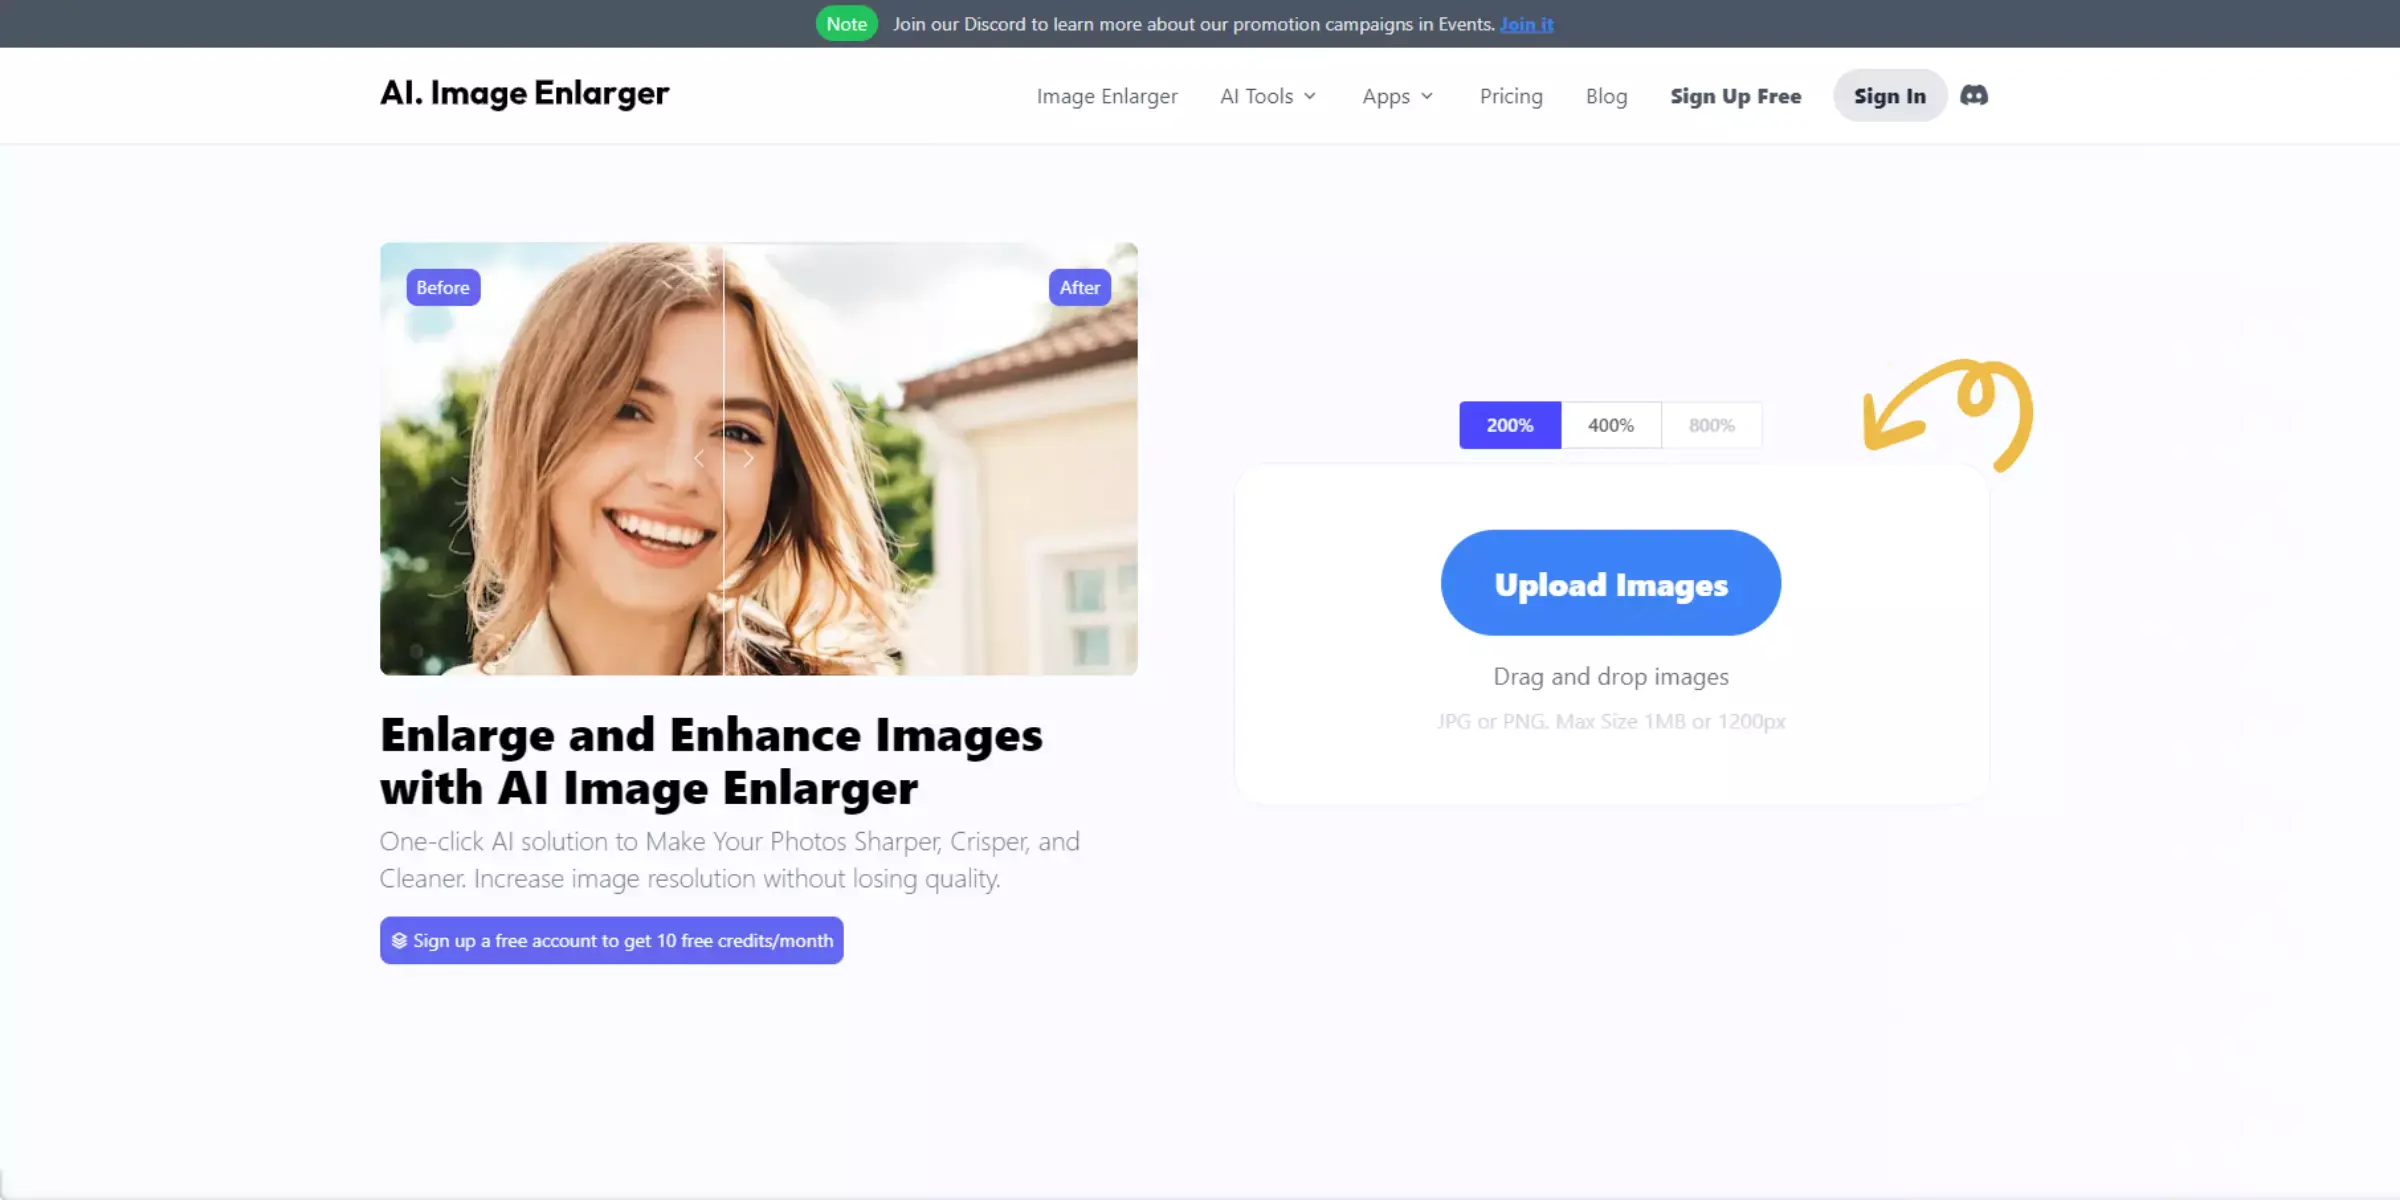
AI Image Enlarger is a cutting-edge tool designed to enlarge images without losing quality. Utilising advanced artificial intelligence, this tool ensures that your photos maintain their sharpness and clarity even when scaled up.
Ideal for enhancing personal images or preparing high-resolution graphics for professional use, AI Image Enlarger offers an efficient and straightforward solution for achieving crisp, detailed enlargements. Its intuitive design and powerful algorithms make it a reliable choice for users seeking top-notch image quality.
Key Features
- AI-powered algorithms for precise image enhancement
- Support for multiple formats, including PNG, JPEG, and BMP
- Easy-to-use interface with drag-and-drop functionality
- Bulk processing capabilities for handling multiple images at once
- Fast processing times with high-quality results
Test Results
- AI Image Enlarger is praised for its ability to enlarge images without losing quality. Users appreciate its user-friendly interface and effective AI-driven enhancements, noting its efficiency in delivering high-resolution results quickly. The tool is well-regarded for its reliable performance and ease of use.
9. Topaz Gigapixel AI
Topaz Gigapixel AI is an advanced tool for enlarging pictures without losing quality. Utilising sophisticated artificial intelligence, it meticulously enhances your images, preserving intricate details and sharpness even at larger sizes.
Whether you're a photographer needing to prepare high-resolution prints or a designer looking to upscale graphics, Topaz Gigapixel AI provides exceptional results with its powerful upscaling algorithms. Its intuitive interface and high-quality output make it an indispensable tool for achieving flawless enlargements.
Key Features
- AI-driven upscaling technology for maintaining image detail and sharpness
- Supports multiple formats, including PNG, JPEG, and TIFF
- Customisable settings for various enlargement needs
- Batch processing for handling multiple images simultaneously
- High-quality output with precise detail retention
Test Results
- Topaz Gigapixel AI is highly praised for its ability to enlarge pictures without losing quality. Users highlight its exceptional detail retention and effective AI enhancements, making it a top choice for those seeking high-resolution results. The tool is celebrated for its accuracy and efficiency in delivering professional-grade enlargements.
10. Imglarger
Imglarger is a powerful tool designed to increase image size without losing quality. Leveraging advanced algorithms, Imglarger ensures that your photos maintain their clarity and sharpness even when scaled up. Ideal for enhancing personal images or preparing visuals for professional use, Imglarger offers a user-friendly platform for achieving high-resolution results effortlessly. Its effective technology makes it a reliable choice for those needing to upscale images while preserving fine details.
Key Features
- Advanced algorithms for precise image enlargement
- Supports various formats, including PNG, JPEG, and GIF
- Simple interface with drag-and-drop functionality
- Batch processing capabilities for efficient handling of multiple images
- Fast processing with high-quality output
Test Results
- Imglarger is well-regarded for its ability to increase image size without losing quality. Users appreciate its straightforward interface and effective enlargement capabilities, noting its reliability in delivering clear and detailed results. The tool is praised for its ease of use and efficient performance.
Tips on How to Make Pictures Bigger Without Losing Quality
Enlarging pictures without losing quality can be challenging, but with the right techniques, you can achieve crisp, clear results. By using AI-powered tools, advanced software, and proper settings, you can scale your images up while maintaining their sharpness and detail. Discover these essential tips for flawless enlargements.
- Use AI-Powered Tools: Leveraging advanced AI-based tools like Upscale.media, Topaz Gigapixel AI, or Let’s Enhance can significantly improve the quality of enlarged images. These tools utilise sophisticated algorithms to enhance detail and clarity.
- Choose the Right Software: Opt for high-quality software like Adobe Photoshop or GIMP, which offer advanced resampling techniques such as Bicubic Smoother or Preserve Details to maintain image quality when enlarging.
- Maintain Original Resolution: Start with the highest resolution version of the image available. Higher-resolution images have more data, which helps in preserving quality during enlargement.
- Adjust DPI Settings: When preparing images for printing, adjust the DPI (dots per inch) settings. A higher DPI setting ensures better detail and sharpness in the enlarged print.
- Use Interpolation Methods: Employ advanced interpolation methods like Lanczos or Sinc in software programs. These methods help in resizing images while preserving edges and minimising blurriness.
- Avoid Excessive Upscaling: Limit the amount of enlargement to prevent significant quality loss. Each enlargement can introduce artefacts, so it’s better to scale incrementally if a large increase is needed.
- Sharpen the Image: After enlarging the image, use sharpening tools to enhance details and counteract any blurriness that might have occurred during resizing.
- Check and Correct Artifacts: Review the enlarged image for any artifacts or distortions and use editing tools to correct them. This step helps in ensuring the final image maintains high quality.
- Save in High-Quality Formats: Save the enlarged image in high-quality formats like TIFF or PNG, which preserve detail and avoid compression artefacts compared to formats like JPEG.
- Experiment and Compare: Test different tools and settings to find the best results for your specific image. Comparing different methods can help you choose the most effective way to enlarge your pictures without compromising quality.
Why do Images Lose Quality When Enlarged?
Images lose quality when enlarged due to the way digital photos are constructed. Each image is made up of pixels, and enlarging an image means stretching these pixels over a larger area. This stretching can result in a loss of detail and clarity, making the image appear blurry or pixelated. When you enlarge an image, the software must estimate and fill in new pixel information, which can introduce artefacts and distortions.
Additionally, if the original image has a low resolution, there is less data to work with, exacerbating the loss of quality during enlargement. Advanced tools and techniques can help mitigate these issues, but some degree of quality loss is often inevitable when significantly increasing image size.
Which Photo Enlarger is Best for You?
Our top recommendation for the best photo enlarger is Upscale.media. With its advanced algorithms and artificial intelligence technology, it excels in preserving image quality while enlarging photos. The user-friendly interface makes it easy to use, and the tool enhances textures and tones, and removes noise during the upscaling process.
From the free plan to more advanced options, Upscale.media offers a range of pricing choices to suit different needs. Experience the magic of Upscale.media and make your pictures bigger without compromising quality.
Conclusion
Enlarging images without losing quality requires the right tools and techniques. By using advanced AI-powered software, selecting proper resampling methods, and starting with high-resolution images, you can achieve clear, detailed enlargements. Implement these strategies to maintain image quality and achieve professional results.
FAQ's
Does "upscale.media" support batch image upscaling?
Batch image upscaling, or upscaling multiple images at once, is a feature that may vary among different upscaling tools. Some tools, including "upscale.media," support batch processing, while others may focus on single-image upscaling.
Can I upscale images on my smartphone or tablet?
Yes, some image upscaling tools offer mobile apps, allowing users to upscale images on their smartphones or tablets. Check the app store for options compatible with your device's operating system.
Are there other free image upscaling tools available
Yes, there are other free image upscaling tools like GIMP, Image Upscaler, and Let's Enhance, which offer basic upscaling capabilities. However, advanced upscaling and AI-based algorithms are often available in paid tools.
Can I use "upscale.media" for free?
"upscale.media" typically offers both free and paid plans. The free plan may have limitations, such as lower-resolution outputs or a restricted number of image upscalings per month. Upgrading to a paid plan unlocks additional features and higher quality results.
Is "upscale.media" the best image upscaling tool without losing quality?
"upscale.media" is a popular upscaling tool known for preserving image quality during enlargement. However, the "best" tool depends on individual preferences and specific requirements. Other options like Topaz Gigapixel AI or Adobe Photoshop's Preserve Details 2.0 may also offer comparable results.
Why would I want to make images larger without losing quality?
Increasing image size without losing quality is essential for various purposes, such as printing high-resolution posters, maintaining image clarity for large displays, or improving image details for professional use.
.avif)
.avif)