How to Upscale an Image & Remove Pixelation With Paint.net?


Looking at a pixelated image can be frustrating, especially when you need a clear, crisp photo for your project or presentation. If you've ever wondered how to remove pixelation and restore your image to its former glory, you're in the right place. In this blog post, we'll guide you through the process of removing pixelation with Paint.NET, a powerful and user-friendly tool designed to enhance your photos effortlessly.
Paint.NET is more than just a simple photo editor; it's a versatile solution for upscaling and refining your images. Whether you're looking to remove pixels from an image or enhance the overall quality, Paint.NET offers a range of features to help you achieve the best results. We'll explore step-by-step how to use Paint.NET to remove pixelation and upscale your images, ensuring they look sharp and professional.
Join us as we dive into the world of Paint.NET and discover how you can turn those pixelated images into high-quality visuals. With our easy-to-follow instructions and tips, you'll soon be able to tackle pixelation issues like a pro, transforming your photos into stunning masterpieces.
What is Paint.NET?
Paint.NET is a free, user-friendly image and photo editing software designed for Windows users. Initially developed as a replacement for Microsoft Paint, it has evolved into a robust and versatile tool that offers a wide range of features for editing, enhancing, and transforming images.
Unlike more complex software like Adobe Photoshop, Paint.NET provides a simpler interface with powerful capabilities, making it accessible for both beginners and experienced users. With Paint.NET, you can perform various tasks, such as resizing images, removing pixelation, and applying artistic effects.
Its intuitive design includes essential tools for editing, like layers, blending modes, and filters, which allow you to make precise adjustments and achieve professional-looking results. Paint.NET's active community and regular updates ensure that it remains a reliable choice for anyone looking to improve their image editing skills. Whether you're upscaling an image or refining details to remove pixelation, Paint.NET provides the tools you need to get the job done efficiently and effectively.
Why You Might Need to Remove Pixelation?
Pixelation occurs when an image is enlarged beyond its original resolution, causing it to appear blocky and unclear. This distortion often happens with low-resolution images or when photos are scaled up without proper adjustments. Removing pixelation is crucial for several reasons:
- Enhanced Visual Quality: Pixelated images can look unprofessional and detract from the overall quality of your work. Whether you're preparing visuals for a presentation, a website, or printed materials, clear and crisp images are essential to make a positive impression.
- Improved Readability and Detail: For images containing text, graphics, or fine details, pixelation can obscure important information. By removing pixelation, you ensure that all elements are legible and well-defined, making your images more effective and engaging.
- Better User Experience: In digital media, pixelated images can negatively impact user experience. High-quality, smooth images contribute to a more enjoyable and visually appealing experience for your audience, whether they are viewing your content online or in print.
- Professionalism and Brand Image: For businesses and brands, pixelated images can undermine credibility and professionalism. Ensuring that all visual content is sharp and polished helps maintain a strong, trustworthy brand image.
By addressing pixelation, you enhance the clarity and impact of your images, ensuring they meet your standards and those of your audience.
Common Reasons for Pixelation in Images
Pixelation is a common issue that can arise for various reasons, each affecting the quality of your images in different ways. Here are some of the most frequent causes:
- Low Resolution: One of the primary reasons for pixelation is using images with low resolution. When these images are enlarged or viewed at a larger size, the individual pixels become more noticeable, leading to a blocky or grainy appearance.
- Excessive Enlargement: Scaling an image beyond its original dimensions without adequate resampling or enhancement can cause pixelation. This often happens when trying to print a small image in a large format or when zooming in on digital images.
- Poor Compression: Images saved with high compression settings, especially in formats like JPEG, can suffer from pixelation. Compression reduces file size but can also degrade image quality, leading to visible artefacts and blockiness.
- Digital Artifacts: Pixelation can occur due to digital artefacts created during editing or saving processes. These artefacts might include blocky areas or irregularities that detract from the overall clarity of the image.
- Inadequate Editing Tools: Using basic or low-quality image editing software can sometimes result in pixelation. Tools that need advanced algorithms for resizing and filtering might not handle image adjustments smoothly, leading to visible pixelation.
- Improper File Formats: Some file formats are better suited for maintaining image quality than others. Using a format that doesn't handle high detail well, such as a heavily compressed JPEG, can exacerbate pixelation issues.
Understanding these common causes can help you take steps to prevent pixelation and ensure that your images remain clear and high-quality.
Importance of Clear Images
Clear images are essential for a range of applications, from personal projects to professional endeavours. Here's why maintaining image clarity is so important:
- Professionalism and Credibility: High-quality, clear images reflect professionalism and credibility. Whether you're creating content for a website, social media, or marketing materials, clear visuals enhance your brand's reputation and convey a sense of trustworthiness.
- Effective Communication: Images often serve as a primary means of communication. Clear visuals ensure that your message is conveyed accurately, making it easier for viewers to understand and engage with your content. This is particularly crucial for instructional materials, infographics, and promotional graphics.
- Enhanced User Experience: Clear images contribute to a positive user experience by providing an aesthetically pleasing and enjoyable viewing experience. In digital environments, high-resolution images ensure that users can see details clearly, which is essential for maintaining their interest and satisfaction.
- Increased Engagement: High-quality images are more likely to capture attention and encourage interaction. Whether it's on social media, a blog, or an advertisement, clear visuals can significantly impact engagement rates and overall effectiveness.
- Accurate Representation: For product photos, portfolio showcases, or any visual representation, clarity is key to presenting your subject accurately. Clear images ensure that details are not lost, which is crucial for making informed decisions or evaluations.
- Print Quality: When it comes to printing, clear images are vital for producing high-quality prints. Pixelated or blurred images can result in poor print quality, diminishing the overall impact of your physical materials.
In summary, clear images play a crucial role in enhancing professionalism, communication, user experience, and engagement while also ensuring accurate representation and high-quality prints.
How to Upscale an Image and Remove Pixelation?
Upscaling an image and removing pixelation can transform your visuals from blurry and blocky to sharp and clear. With Paint.NET, you have a powerful yet accessible tool at your disposal for this task. Paint.NET offers a straightforward approach to enhancing image quality, making it an ideal choice for both beginners and experienced users.
In this guide, we'll walk you through the steps to upscale an image, addressing pixelation issues along the way. By leveraging Paint.NET’s features, you can achieve a polished, professional look for your images, ensuring they meet your high standards of clarity and detail. Ready to elevate your visuals? Let’s dive into the process!
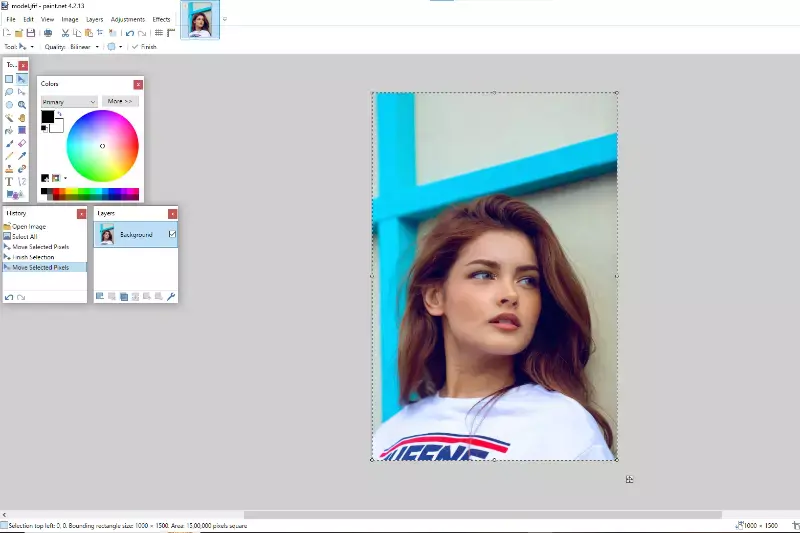
Step 1 - To begin, launch Paint.NET and open the image.
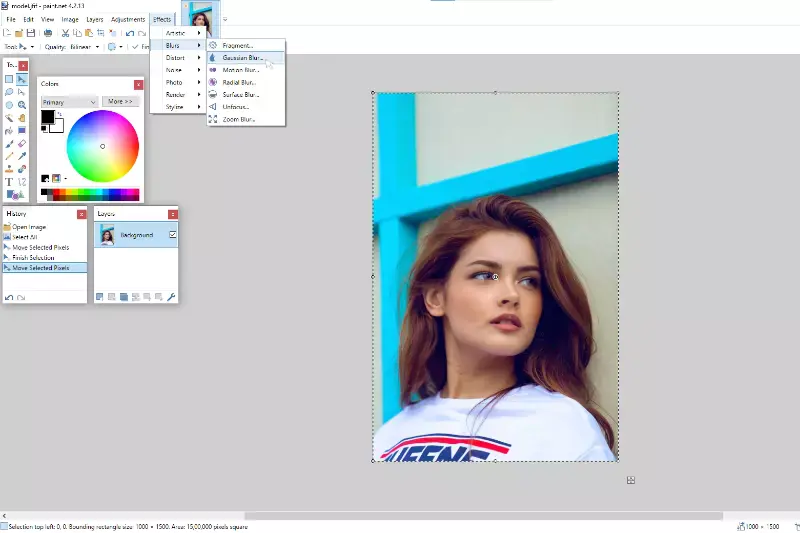
Step 2 - The next step is to choose Effects. Go to the Blur option and select Gaussian Blur.
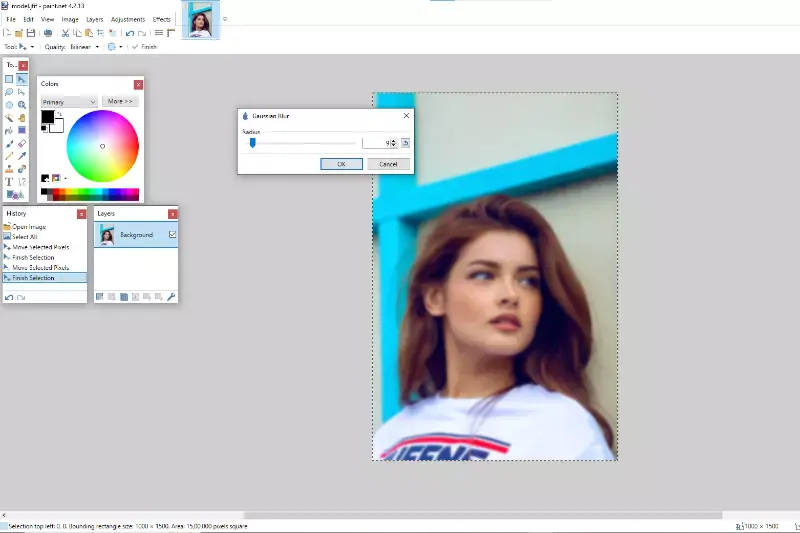
Step 3 - Drag the slider with your mouse to lessen the pixel impact.
Step 4 - Once more, click Effects and choose Photo and Sharpen from the menu.

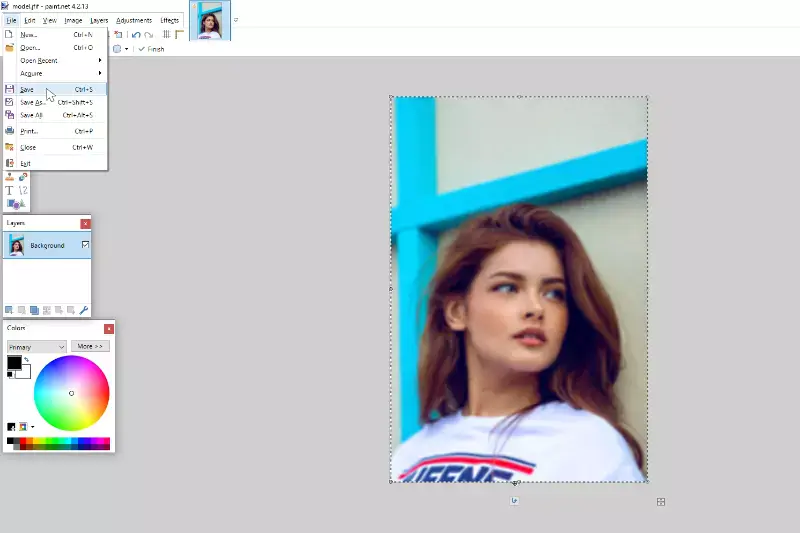
Step 5 - Get the right setting for high efficiency by using the slider. Save the picture to finish the process.
Advanced Techniques for Better Results
To take your image enhancement to the next level using Paint.NET, you can employ several advanced techniques. These methods help in refining the image quality further, reducing artifacts, and achieving a more polished look. Here's how to use these advanced techniques for optimal results:
1. Utilising the Clone Stamp Tool
The Clone Stamp Tool in Paint.NET allows you to correct imperfections and remove unwanted elements from your image. This tool copies pixels from one part of the image and applies them to another area, effectively smoothing out inconsistencies and artefacts.
- Select the Clone Stamp Tool from the toolbar.
- Adjust the Brush Size according to the area you want to correct.
- Hold the Ctrl key and click on the area you want to clone from. This sets the source point.
- Release the Ctrl key and brush over the area you want to correct. The pixels will be copied from the source point to the target area.
This technique is particularly useful for removing small blemishes or correcting areas that have become pixelated during the upscaling process.
2. Leveraging Plugins and Extensions
Paint.NET supports a wide range of plugins and extensions that can enhance its functionality. Plugins can offer advanced tools and features not available in the default version, making it easier to achieve high-quality results.
- Browse Paint.NET Plugin Sites like the Paint.NET forum or plugin repositories to find tools that suit your needs.
- Download and Install Plugins following the instructions provided by the plugin developer.
- Access the Plugin Tools from the “Effects” or “Adjustments” menu in Paint.NET.
Plugins like the “Reduce Noise” or “Sharpen” filters can help in further refining your upscaled image, making it smoother and clearer.
3. Applying Selective Color Adjustments
Selective colour adjustments can fine-tune the colours and tones in specific areas of your image. This technique is useful for correcting colour shifts or enhancing certain parts of the image.
- Use the Color Picker Tool to select the colour range you want to adjust.
- Open the Adjustments Menu and choose options like “Brightness/Contrast” or “Hue/Saturation.”
- Adjust the Settings to target specific colours or areas of the image for more precise control.
Selective adjustments can help in balancing the overall image and improving the final appearance.
4. Applying High Pass Filter for Sharpness
The High Pass Filter can be used to enhance the sharpness of your image without introducing excessive noise or artefacts.
- Duplicate Your Image Layer and apply a Gaussian Blur to the duplicate layer to smooth out the image.
- Apply the High Pass Filter to the blurred layer, which is found under “Effects” > “Photo” > “High Pass.”
- Set the Radius to highlight the edges and details you want to enhance.
- Change the Blending Mode of the layer to “Overlay” or “Soft Light” to blend it with the original image.
This method sharpens the image by emphasising edges and details, improving clarity without compromising the overall quality.
5. Using Layer Masks for Fine-Tuning
Layer masks allow you to apply adjustments or effects to specific areas of your image, providing precise control over the final result.
- Add a Layer Mask to your image layer.
- Paint on the Layer Mask with black to hide areas or white to reveal areas where you want the effect to be applied.
- Use Gradients or soft brushes for smooth transitions between adjusted and unadjusted areas.
- Layer masks are ideal for enhancing certain sections of your image while keeping other areas unchanged.
By incorporating these advanced techniques into your workflow, you can achieve superior results in image upscaling and pixelation removal with Paint.NET. These methods provide enhanced control over the final output, ensuring your images look their best.
How to Upscale Image Resolution With Upscale.media?
Are you looking to elevate your images with stunning clarity? Upscale.media is your go-to tool for effortlessly upscaling image resolution and enhancing photo quality. With its advanced AI technology, Upscale.media transforms your low-resolution images into high-definition visuals without losing detail.
Simply upload your file in formats like PNG, JPEG, JPG, WEBP, or HEIC, and let our powerful algorithms do the work. Whether you need to enhance a personal photo or refine a professional image, Upscale.media ensures exceptional results every time. Discover how easy it is to upgrade your images to new levels of quality with our intuitive and effective solution.
Step 1 - Visit the Website and go to Upscale.media to access the tool.
Step 2 - Click on the upload button to select the photo you want to enhance. You can upload various file formats easily.
Step 3 - Choose the resolution you wish to upscale your image to. The tool provides several options to suit your needs.
Step 4 - Click on the "Upscale" button to begin processing. Wait a moment as the AI enhances your image.
Step 5 - Once the process is complete, download your newly upscaled image and enjoy your improved visuals.
Conclusion
Paint.NET offers a powerful suite of tools for upscaling images and removing pixelation. By leveraging features like the Clone Stamp Tool, plugins, and selective colour adjustments, you can enhance image quality and achieve professional results with ease. Transform your pixelated photos into clear, high-resolution visuals effortlessly.
FAQ's
How do I upscale an image to improve quality?
Upscaling an image to improve quality is straightforward with Upscale.media. Here are the steps:
Step 1: Visit the Upscale.media website.
Step 2: Upload the image you want to upscale.
Step 3: Let the AI tool process and enhance your image, improving its resolution and clarity.
Step 4: Adjust the level of enhancement to suit your needs.
Step 5: Download your high-resolution, enhanced image.
Upscale.media uses AI technology to effectively improve the quality of your images.
Is there a way to upscale an image?
Yes, there is a way to upscale an image. You can use Upscale.media, an AI-powered tool designed to enhance the resolution and overall quality of images. Simply upload your image to the platform, and it will automatically process and upscale it, resulting in a high-resolution, high-quality image.
Is there any free image upscaler?
Yes, Upscale.media is a free image upscaler. This AI-powered platform allows you to enhance the resolution and overall quality of your images at no cost, making it an effective and accessible solution for improving image quality.
How do I fix poor image quality?
To fix poor image quality, you can use Upscale.media. This AI-powered tool enhances the resolution and overall quality of your images, effectively improving their clarity and detail. Simply upload your image to the platform and let the AI do the rest.
Can you upscale a low quality image?
Yes, you can upscale a low-quality image using Upscale.media. This AI-powered platform enhances the resolution and overall quality of your images, transforming low-quality images into high-quality, detailed pictures.
How do I upscale an image without blurring it?
To upscale an image without blurring it, you can use the following tools:
- Upscale.media
- Let's Enhance
- Bigjpg
- Topaz Gigapixel AI
- Deep Image
These platforms use AI technology to upscale images while preserving and enhancing their details, resulting in high-resolution, clear, and sharp images.


.avif)

.avif)
.avif)